BBGFC.com

white_cropped-bbgfclogo-300x100-1

How to Field Dress a Deer 


How to Field Dress a Deer 


If hunting is your passion and you’ve just caught a deer, you’ll need to field dress it as soon as possible after the animal has been killed. Immediately following the disassembly of your firearm or bow – you can learn more about the best bow stands here – it is imperative that you begin field dressing it immediately. Throughout this post, we’ll take you step-by-step through the most important aspects of the process.
How to Field Dress a Deer 

In order to field dress a deer, there are a few things you should do first.

Once the deer has been taken down, you may become overjoyed and enthusiastic about your catch that you forget to follow some basic safety precautions. It is common for people to approach a hunted animal right away without first confirming that it is actually dead. Because the animal will instinctively try to defend itself with its last remaining strengths if you touch it, this can result in serious injuries.

In order to avoid this, you should not rush to grab the deer once it has been brought down, but should instead approach it slowly. Wait for a few more minutes after you’ve gotten close enough to make sure it hasn’t moved any more before proceeding. During this time, you should pay close attention to it to determine whether or not it is still alive.

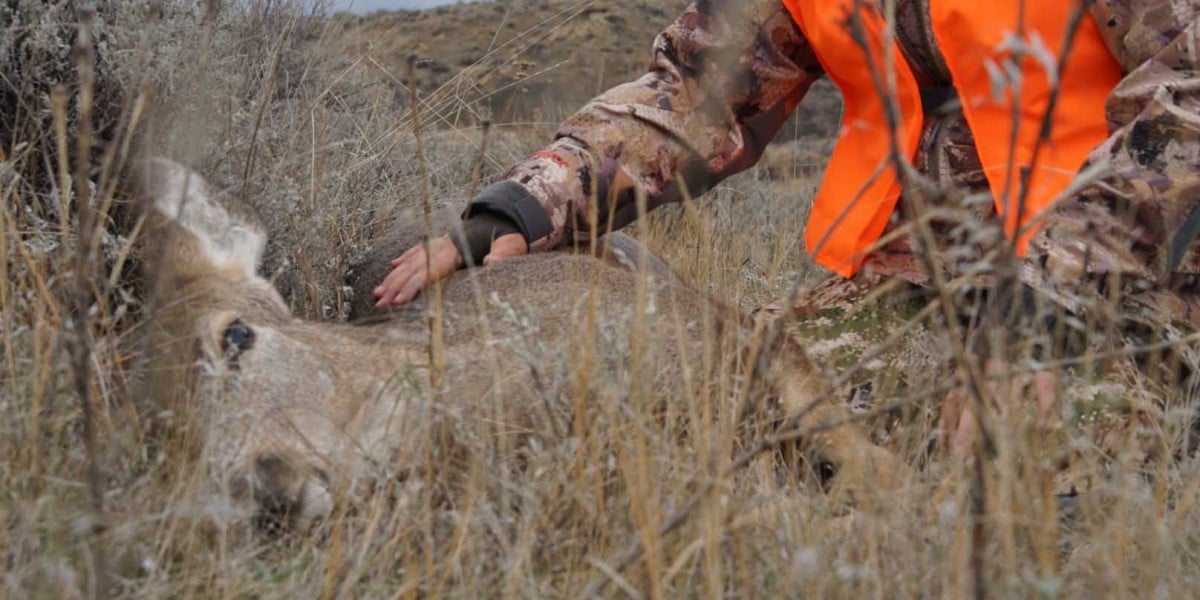
The final step in determining whether or not the deer is dead is to touch it. This should not be done with your hand in any way. Poke it with a stick if you have one. Unless the deer reacts to your presence, you’re ready to begin field dressing the animal.

It is necessary to remove any jewelry or other accessories such as rings, bracelets, or watches before beginning the process of field dressing. Even if you wear rubber gloves, which are highly recommended, you still run the risk of staining them with blood or dirt during the process.

How to Field Dress a Deer 

What Are the Benefits of Field Dressing the Deer?

This is a logical question, especially for someone who is new to deer hunting and has no prior experience. The reason why you should field dress the deer is that it will help to preserve the quality of the meat you will be eating. This should be done immediately after the animal has died, rather than after you have transported it home.

During the dressing process, the entrails of the animal as well as the blood are removed. Because of this, the likelihood of developing dangerous bacteria is decreased.

The longer you wait, and the longer the animal’s organs remain inside its body, the greater the likelihood that its meat will become spoiled. Furthermore, if one of the digestive organs of the animal is damaged during the hunting process, the meat’s quality can be adversely influenced.

As a result, the juices from the deer’s paunch should be removed because they have the potential to spoil the meat. This can be accomplished by wiping them away with a rag or by using water to wash them away. Following the application of water, pat the affected area of the deer’s body until it is dry.

The animal should be field dressed immediately after it has been killed because doing so helps to reduce the animal’s body heat, which is important in ensuring high-quality meat.

How to Dress a Deer in the Field

There are a few precise steps you should follow in order to field dress a deer quickly and correctly without difficulty. You might not remember all of them when you’re actually dealing with the animal, so make a short list of all of the fundamental steps or feel free to refer back to this article.

Having a good knife is essential for performing this operation, and you will need one to do it properly. This means you’ll need one that’s razor-sharp so that you can easily cut through the tissue. You must keep in mind that you must dress the deer as quickly as possible, and you cannot afford to waste time struggling with old and inefficient knives.

Additionally, you may wish to bring a gut-hook to aid you in completing the process more quickly overall. Field dressing a deer refers to the process of removing the animal’s internal organs. During this process, the blood will be drawn from the body, and you will be left with only the carcass to take care of. This is the part of the deer that you will actually be using for your purposes.

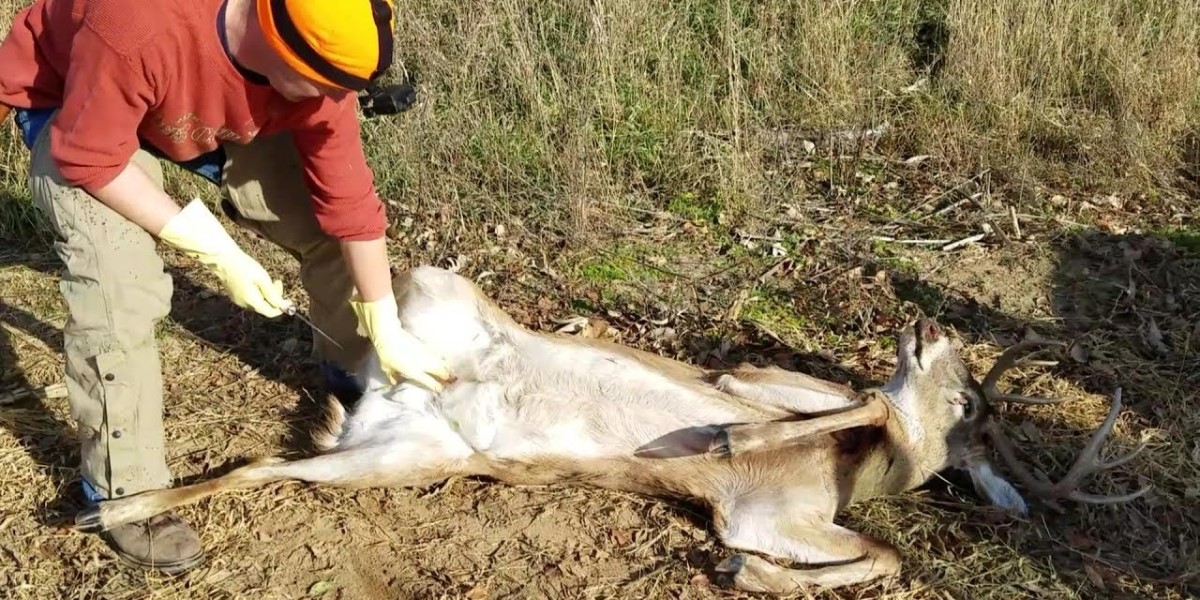
You begin by correctly positioning the deer so that the blood flow is directed in a single direction, as shown in the diagram. You’ll need to find a slightly sloping area and position the deer there on its back with its head raised slightly above the ground. If there are no slopes, you can clean the blood as it flows, and you can also tie the deer’s legs to trees for easier access if there are no slopes to clean the blood.

After making an incision around the anus and releasing the final portion of the colon, you can proceed with your procedure. Make certain that you do not puncture it because the contents of the bag can contaminate and spoil the meat.

After that, you begin cutting the deer’s hind legs from its back. Making your first incision in the area that forms a V between the animal’s legs and then making a long and straight incision up its belly is what you want to do. The incision should not be too deep, and it should only cut through the skin to be effective.

Then you have to start cutting the skin away from the organs without cutting into them. It is possible that if the animal’s entrails are penetrated during the process, they will eliminate substances that are detrimental to the meat.

Make a long cut across the deer’s body, from the pelvic area all the way up to the sternum, with a sharp knife or a gut kook. Keep the blade of your knife facing up so that you don’t risk cutting any of the organs. Also, try to keep the cut as straight as possible on the deer’s midline, if at all possible.

The next step involves cutting the diaphragm, which must be removed in order to gain access to the organs of the chest cavity. After you have removed the diaphragm from the cavity, you must pull it away from the spine and remove it from the body.

Detach the windpipe, which is located above the heart and lungs, and then remove the windpipe. After you’ve separated it from the organs, you’ll be able to get to the internal organs. Once you have reached the heart and liver of the deer, carefully remove them from the body and place them in a plastic bag or container, as these organs will be stored separately.

You then proceed to the step in which you actually remove the entrails: the intestine, bladder, stomach, and lungs (if applicable). You can remove all of these organs at the same time by yanking on the windpipe with great force. Because they are connected to the carcass, it is possible that these internal organs will be more difficult to remove. If this is the case, carefully cut away any tissue that is keeping them attached to the carcass over time.

Similarly to the other entrails, it should be simple to remove the colon that was separated at the start of the operation.

As a result of the fact that other animals will feed on them, it is acceptable in some states to simply leave the entrails at the field dressing site. Before you do this, however, make sure you are in compliance with local regulations. Finally, allow the blood to drain from the animal by turning it so that its open cavity points toward the ground.
How to Field Dress a Deer 

Is There Anything Else You Should Do After Field Dressing a Deer?

The animal must be transported after it has been field dressed, so make sure you have everything ready. This may necessitate some effort, but there are methods available to make your job easier.

It’s important to remember that the body should be dragged rather than carried on the shoulder during the process. You will not only avoid back problems, but you will also avoid the possibility of being shot by another hunter who sees the deer and believes it to be a live deer.

Before you begin transporting the carcass, you should cover it with a cloth to keep it from getting damaged. There’s no way you want this valuable meat to be dragged through leaves and mud, or to become contaminated by various other particles. In addition, by covering it, you will prevent those pesky flies from savoring your future meal with you.

What you do with the carcass once you get back to your car is dependent on how far you have to drive to reach your destination. If you are only a few miles away from your home, you can simply put it in your car in its current state, laid out on a clean plastic bag, and drive away. It is critical to keep the meat as clean as possible at all stages of the cooking process.

If you’re traveling a long distance, you’ll want to make sure the meat stays cold. More plastic bags and plenty of ice will be required in order to accomplish this. You’ll need to wrap the deer in this cover and then place a plastic bag filled with ice inside the carcass to keep the deer cool.

Last but not least, keep in mind that deer hunting is strictly regulated by law. When selecting the hunting area in which you will be hunting, you must ensure that you comply with all applicable laws and regulations, and you must always have your hunting permit with you.

When you get home, you should hang the deer by its antlers to ensure that the rest of the blood is drained from the animal.

Some people enjoy deer hunting because it is a passion for them, while others do it solely for the purpose of selling the meat and earning money. No matter what the circumstances are, you should always field dress the deer as soon as possible after it has died in order to ensure that the meat retains its high-quality characteristics. Follow the steps outlined above to accomplish this, and use caution when transporting the carcass to avoid causing any damage.

How to Field Dress a Deer

Whether you enjoy hunting or not, if you have recently captured a deer, you will need to field dress it immediately after the animal has died. After you have laid your gun or bow down – you can find more information about the best bow stands here – it is time to begin field dressing it right away. Throughout this piece, we’ll take you step-by-step through the most important aspects of the procedure.


What Should You Do Before Field Dressing the Deer?

Once the deer has been taken down, you may become overjoyed and thrilled about your prize that you forget to follow some basic safety precautions. It is common for individuals to approach a hunted animal right away without first confirming that it is indeed dead. Because the animal would instinctively try to protect itself with its last remaining strengths if you touch it, this can result in serious injury.

In order to avoid this, you should not rush to seize the deer once it has been brought down, but should instead approach it gently. Wait for a few more minutes after you get close enough to ensure that it hasn’t moved any farther. During this time, you should pay close attention to it to determine whether or not it is still alive.

The final step in determining whether or not the deer is dead is to touch it. This is something you should not be doing with your hand. Poke it with a stick if you have one. Unless the deer reacts to your presence, you are ready to begin field dressing it.

It is necessary to remove any jewelry or other accessories such as rings, bracelets, or watches before beginning the procedure of field dressing. Even if you wear rubber gloves, which are strongly advised, you still run the danger of staining them with blood or dirt during the process.


Why Should You Field Dress the Deer?

Especially for someone who is new to the sport of deer hunting, this is a reasonable inquiry. The reason why you should field dress the deer is because it will help to preserve the quality of the meat you will be eating. This should be done quickly after the animal has died, rather than after you have transported it home.

During the dressing process, the entrails of the animal as well as the blood are removed. Because of this, the likelihood of developing hazardous germs is decreased.

The longer you wait, and the longer the animal’s organs remain inside its body, the greater the likelihood that its flesh will get ruined. Furthermore, if one of the digestive organs of the animal is destroyed during the hunting process, the meat’s quality can be adversely affected significantly.

As a result, the liquids from the deer’s paunch should be removed because they have the potential to ruin the flesh. This can be accomplished by wiping them away with a rag or by using water to wash them away. If you use water, pat the area of the deer’s body that has been wet until it is completely dry.

The animal should be field dressed immediately after it has been slaughtered because doing so helps to minimize the animal’s body heat, which is crucial in assuring high-quality meat.


How to Field Dress the Deer

There are a few exact measures you should follow in order to field dress a deer quickly and correctly without difficulty. Remembering all of the essential procedures may be difficult when the animal is in front of you; therefore, make a short note of them or feel free to refer back to this page for refresher.

Having a good knife is essential for performing this surgery, and you will need one to do it properly. This means you’ll need one that’s razor-sharp so that you can simply cut through the tissue. You must keep in mind that you must dress the deer as quickly as possible, and you cannot afford to waste time dealing with old and inefficient knives.

Additionally, you may choose to bring a gut-hook to aid you in completing the job more quickly overall. Field dressing a deer refers to the process of removing the animal’s internal organs. During this process, the blood will be drawn from the corpse, and you will be left with only the carcass to take care of. This is the part of the deer that you will actually be using for your purposes.

You begin by correctly situating the deer so that the blood flow is directed in a single direction, as shown in the diagram. You’ll need to find a little sloping spot and position the deer there on its back with its head raised slightly above the ground. If there are no hills, you can clean the blood as it runs, and you can even bind the deer’s legs to trees for easier access if there are no slopes to clean the blood.

After making an incision around the anus and releasing the final piece of the colon, you can proceed with your procedure. Make certain that you do not puncture it because the contents of the bag can contaminate and destroy the meat.

After that, you begin severing the deer’s hind legs off its back. Making your initial incision in the place that makes a V between the animal’s legs, then making a long and straight incision up its belly, is what you want to do. The incision should not be too deep, and it should simply cut through the skin to be effective.

Then you have to start removing the skin away from the organs without cutting into them. It is possible that if the animal’s entrails are punctured throughout the process, they will expel toxins that are harmful to the flesh.

Make a long incision across the deer’s body, from the pelvic area all the way up to the sternum, with a sharp knife or a gut cutter, according on your preference. Keep the blade of your knife facing up so that you don’t risk injuring any of the organs. Also, attempt to keep the cut as straight as possible on the deer’s midline, if at all possible.

The following stage is cutting the diaphragm, which must be removed in order to have access to the organs of the chest cavity. After you have removed the diaphragm from the cavity, you must pull it away from the spine and remove it from the body.

Detach the windpipe, which is located above the heart and lungs, and then remove the windpipe. After you’ve separated it from the organs, you’ll be able to get to the internal organs. Once you’ve reached the heart and liver of the deer, carefully remove them from the body and place them in a plastic bag or container, as these organs will be kept apart from the body.

You next proceed to the step in which you actually remove the entrails: the intestine, bladder, stomach, and lungs (if applicable). You can remove all of these organs at the same time by yanking on the windpipe with great force. Because they are attached to the carcass, it is possible that these internal organs will be more difficult to remove. If this is the case, carefully cut away any tissue that is keeping them attached to the corpse over time.

Similarly to the other entrails, it should be simple to remove the colon that was separated at the start of the procedure.

As a result of the fact that other animals will feed on them, it is acceptable in certain jurisdictions to just leave the entrails at the field dressing location. Before you do this, though, make sure you are in compliance with local regulations. Finally, let the blood to drain from the animal by turning it so that its gaping cavity points toward the ground.


What Should You Do After Field Dressing the Deer?

The animal must be transported after it has been field dressed, so make sure you have everything ready. This may necessitate some effort, but there are methods available to make your job easier.

It’s vital to remember that the body should be dragged rather than carried on the shoulder during the process. You will not only avoid back troubles, but you will also eliminate the possibility of being shot by another hunter who sees the deer and believes it to be a live deer.

Before you begin transporting the carcass, you should cover it with a towel to keep it from becoming damaged. You don’t want this valuable meat to be dragged through leaves and mud, or to become polluted by many other particles. In addition, by covering it, you will prevent those pesky flies from savoring your future dinner with you.

What you do with the carcass once you get back to your car is dependent on how far you have to drive to reach your destination. If you are only a few miles away from your home, you can simply put it in your car in its current state, set out on a clean canvas bag, and drive away. It is critical to maintain the meat as clean as possible at all stages of the cooking process.

If you’re traveling a long distance, you’ll want to make sure the meat stays cold. More plastic bags and plenty of ice will be required in order to do this. You’ll need to wrap the deer in this cover and then place a plastic bag filled with ice inside the carcass to keep the buck cool.

Last but not least, keep in mind that deer hunting is strictly regulated by law. When selecting the hunting region in which you will be hunting, you must ensure that you comply with all applicable laws and regulations, and you must always have your hunting licence with you.

When you get home, you should hang the deer by its antlers to ensure that the rest of the blood is drained from the animal.

Some people enjoy deer hunting because it is a passion for them, while others do it just for the purpose of selling the meat and earning money. No matter what the circumstances are, you should always field dress the deer as soon as possible after it has died in order to guarantee that the meat retains its high-quality characteristics. Follow the techniques outlined above to accomplish this, and use caution when carrying the corpse to avoid causing any damage.